

Do It All Project Bike Wrap Up
by Paul Horta-Hopkins · 27/02/2017
Do It All Project Bike Wrap Up
Josh Ross
Josh wraps up his Do It All Cannondale CAAD9 Project.
Over the last year and half, I’ve occasionally discussed the Do It All CAAD9 project bike. At this point, it’s complete. The bike has been transformed, and it has proven itself a capable partner for everything I’ve ever asked of it. I’ve pulled my boy in his trailer all over with it; I’ve used it for hill climbing races; I won a TT championship for my age group with it; I’ve ridden it in the rain, and I’ve covered just about 8,000 miles with it. Let’s take a look back at the pieces and see how everything is holding up.
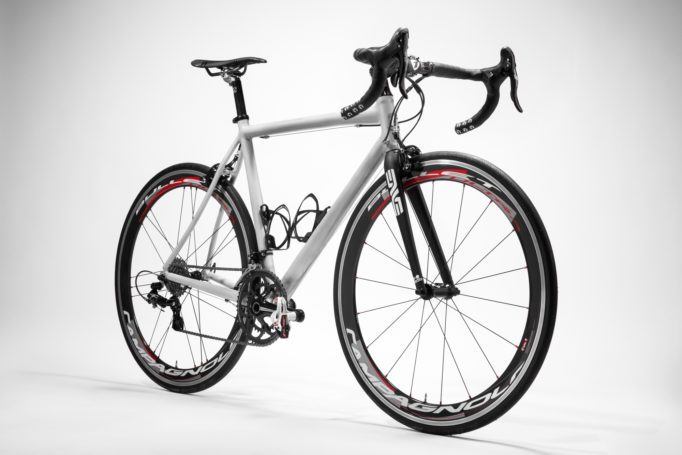
The Do-it-all bike in it’s new livery
Time Xpresso 8: I chose the Time Xpresso series of pedals for this project because of their exceptional lightness and price as well as their ease of entry and exit. These details have not changed over time. I can currently find the Xpresso 8 available for around $105 which is significantly cheaper than the MSRP of $249, and their core functionality hasn’t changed.
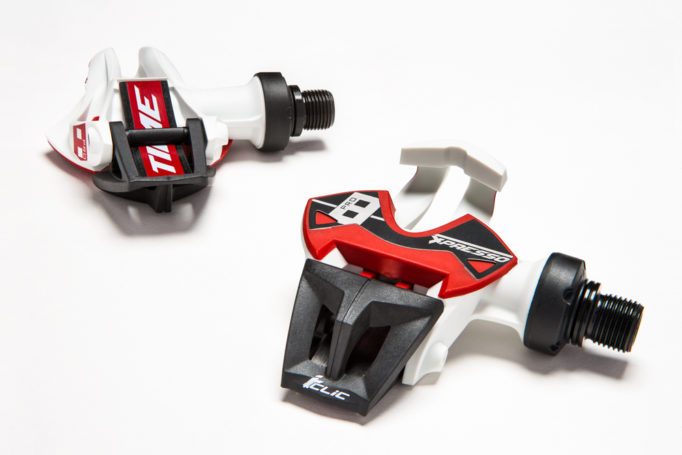
Time Xpresso 8 pedals, light but with a few issues
One of the frequent points you’ll see in discussions about the Xpresso pedals is how quickly you’ll need new cleats. You will need to replace them more often, and it’s this piece that ended up leading to one of the biggest pain points about them. At least in Portland, Oregon, USA, Time products are not well stocked or easy to find. If I wanted cleats, it was impossible to find them locally, and they need to be replaced after about three months of heavy use. I’d recommend checking your local bike shop to see if they stock the cleats before you consider purchasing Xpresso pedals.
Another point that I saw come up often in discussions was issues with the bearings. This was not something I experienced, however, even with heavy winter use. If you do run into problems with the bearings, this isn’t considered a user serviceable piece, and you’d need to ship them to Time. That always made me a bit nervous but ultimately was never a problem.
One issue I did run into, which I’ve never seen discussed, is the fragility of the blade that functions as the spring. In my initial review, I incorrectly said it was steel. It’s actually carbon, and if you happen to stomp on it, because you get the wrong side of the pedal, it can be damaged. Fortunately, this is an easy fix. Contact Time, and you can get replacement parts. It will take 5 minutes, at most, to swap them out. So, I’d still happily recommend the Time Xpresso 8 but only after checking if you can find the cleats locally.
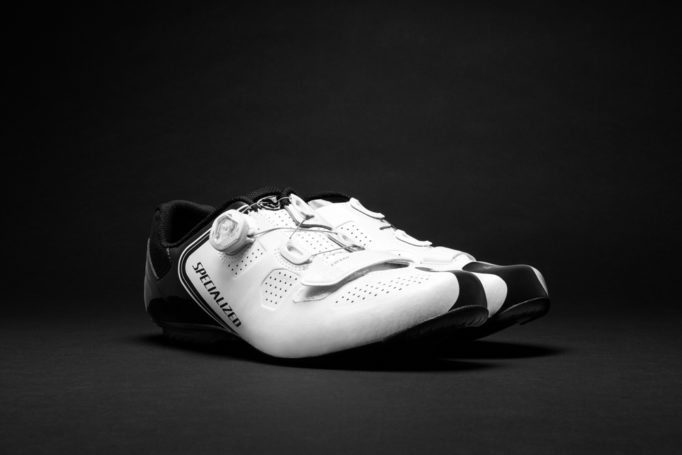
The Specialized Expert Road Shoe, a good value shoe, but keep them clean!
Specialized Expert Road Shoe: At the time I wrote about these shoes, I wasn’t really able to induce flex in the carbon sole. Almost two years later, I sometimes can. It’s not something I consider an issue, though. In certain situations, I can get it to flex, but I wouldn’t say it affects my performance. These remain really great shoes for the price. They aren’t the lightest, they only have one boa adjuster, and you can certainly find stiffer shoes, but they are light enough, stiff enough, and remain good value. I never managed to break a boa adjuster, and the only thing that I can say about these shoes, in retrospect, is that the white can be hard to clean. That shouldn’t come as a surprise to anyone, though. Specialized has a huge dealer network, and you should be able to find a pair locally that you can try on. If they work for you, these are a good buy.
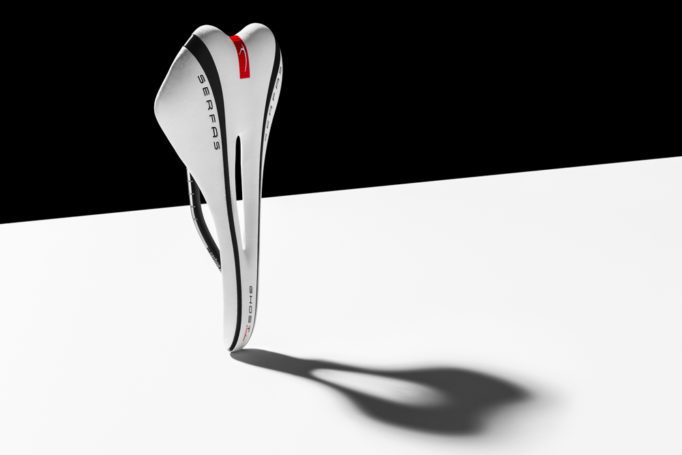
The Serfas Ghost carbon saddle was an unknown, but has proved a firm favourite
Serfas CRB-RS2W Ghost Carbon Saddle: This saddle is actually one of the big surprises of this build. Lots of the other parts were somewhat known before I chose them. I’d never heard of Serfas saddles before, and it has turned out to be one of my favourite pieces of gear. I damaged this saddle during a photo shoot for the project and actually spent a good amount of time looking at other options. I discussed the Bontrager Paradigm XXX saddle and found it to be exceptionally well made, but not quite right for me. I also rode for a long time with the Sella San Marco Aspide Carbon FX saddle. The Aspide is a beautiful saddle that is incredibly light, however, after less than a year the centre section broke down to the point that it was contacting the top of the seat post.
Meanwhile, through it all, the CRB-RS2W has continued to be absolutely comfortable with only a very slight weight penalty and at a significant discount compared to other high-end saddles. In fact, the price has dropped, a lot. The MSRP is now $60 for a 155 gram carbon saddle that has held up incredibly well after years of use.

The Blackburn Slick Bottle Cage, light and cheap what’s not to like?
Blackburn Slick Bottle Cage: This is another piece that I love telling people about. The value for what you get is just incredible. These cages have held up all this time, and I’ve never lost a bottle. Meanwhile, they weigh 23 grams, less than most carbon options, and will cost about $15 each. They can be difficult to get bottles out of if you haven’t washed your bottle for a while, and I’ve also run into issues with getting the bolts tight. Because the plastic is so thin, the whole unit is very flexible, and when you tighten the bolts down, the cage will actually twist a bit. This puts pressure on the bolt such that it will loosen again. Some threadlock fixed things up, though, and for the price, those are easily overlooked issues.

The Time Sports Ergo drive bar and stem, woven French goodness
Time Sports Ergo Drive Bar and Stem: The Time sports bar and stem are the first of the pieces on this build that, in retrospect, I question a little. I stand by the initial review, in that they are incredibly high quality pieces that are exceptionally stiff. I question, however, if this is money well spent. The stem in particular is really expensive for a piece that frequently gets changed, and it’s probably not worth spending quite so much on.
Anytime I review pieces that are expensive compared to the competition, I try to balance my own life circumstances with the review of the product. If you’ve got the money to spend, these are exceptionally good products. I just wonder if the money spent on these makes sense for this project. In terms of performance, though, these bars are still the stiffest I’ve ever ridden, and it really does both reduce road chatter and give a really great platform for hard efforts. It’s also worth noting that these are absolutely beautiful to look at and still bring a smile to my face.

The Campagnolo Athena groupset
Campagnolo Athena: The Campagnolo Athena groupset has since been replaced with the Potenza groupset, and I haven’t had a chance to review the Potenza as of yet. The details of Athena vs Potenza are likely not important to this look back, though. At the time, one of the big things I discussed with Athena was how it was an affordable option from Campagnolo that was meant to compete with Ultegra, and that has held true. The only issue I’d like to bring up in retrospect, is that you’ll want to make sure you know someone who can help you with Campagnolo. Find a good mechanic who knows Campagnolo and bring beer often. Not because you’ll need a mechanic often, I certainly haven’t, but because when you do, it can be difficult to find someone who actually knows what they are doing.
Last spring, I was having a weird shifting issue that I couldn’t figure out. I took it to a few places, and it turned out to be a bent hanger as well as a need for new cables. Just about every mechanic I took it to, though, would start the discussion with their own, incorrect and outdated, opinion of Campagnolo, and it became a bit of a chore to deal with. Eventually, I found someone who knew Campagnolo well, and they replaced the cables as well as adjusted it better than it ever was. It’s been flawless before and after. As I said at the time, all the major groupsets of today are exceptionally good, but I love the way that Campagnolo shifts and the feel of the controls. Don’t listen to people who don’t know and tell you Campagnolo is hard to work on or expensive. It is a bit different, but it’s priced competitively and only requires someone familiar with the system.
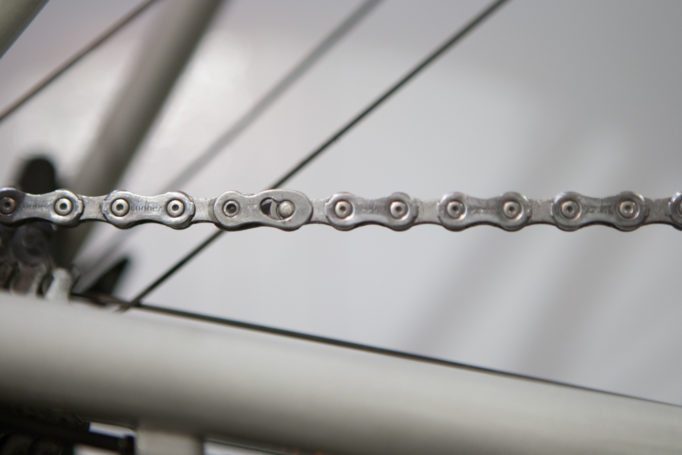
Simple to remove, but it wasn’t happy with Campagnolo
Connex Chain: I think, looking back, I’d probably recommend against the Connex chain. I love the ability to remove your chain easily, but it ended up being one more piece to worry about when I went hunting for a problem in the drivetrain. Mechanics would say they weren’t so sure about using the Connex chain versus a Campagnolo chain, and in the end it wasn’t worth the hassle, when I rarely removed the chain anyway. I did also find the Campagnolo chain lasted a bit longer.
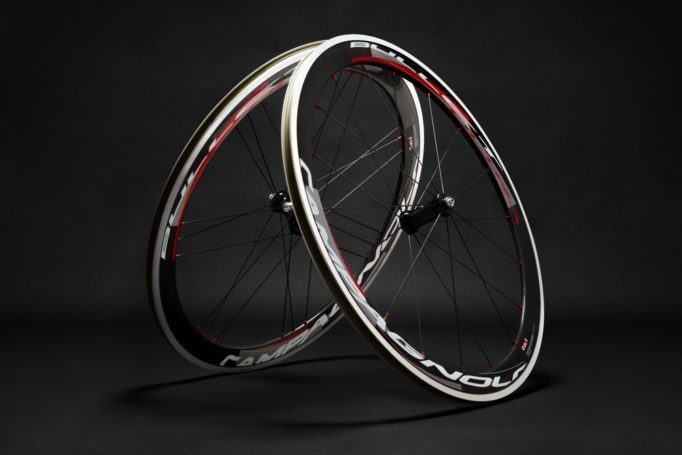
The Campagnolo Bullet Ultra combines carbon, aluminium and ceramic materials to produce a top class do-it-all wheel
Campagnolo Bullet Ultra: These are a fantastic investment that you’ll be able to move from bike to bike for years to come. Every time some new company sends me information to look at, I compare it to these wheels, and the Campagnolo is either competitive or an outright winner. They aren’t the most state of the art anymore, as they use a more traditional V shape, they are not tubeless compatible, and at a 20.5mm external width, they are thinner than more modern designs. But when you look at the weight, 1590 grams for the set, in relation to the price and depth, I can find them for just a bit over $1000 currently, they still really shine.
They also look fantastic and the stopping power, with help from the aluminium brake track, is confidence inspiring no matter the situation. I’m also a very big fan of the sealed internals that requires no rim tape. As I mentioned in my initial review, I did experience a bit of down time when I needed to special order a replacement spoke from Campagnolo, but I’ve never had that happen since, and because the spokes come only as a set, I now have extras if it ever does happen again. I plan to discuss the difference in moving to a deeper wheelset in future articles, but I will mention here that while it’s subtle, it’s definitely noticeable. My opinion of these as a great upgrade that are well worth what they cost hasn’t changed, and has actually been strengthened, as time has gone on.
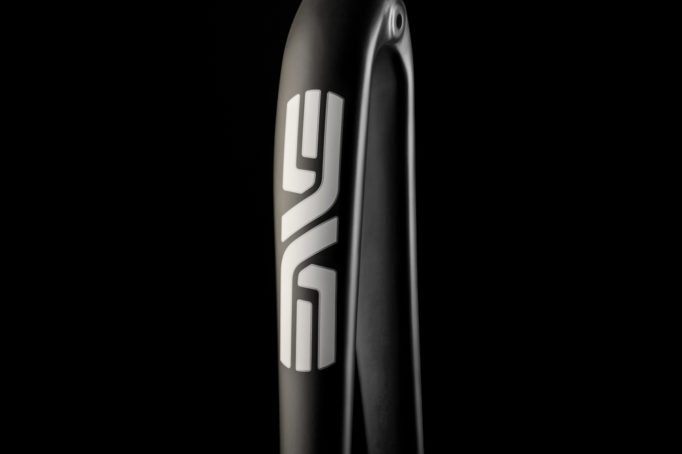
The Enve 1.0 fork, sleek and black, it’s also light and strong
Enve 1.0 Fork: The Enve fork on this project might have been the upgrade that was the biggest surprise in terms of what it did for the bike. It’s really astounding how much this piece transformed the feel of the bike. The one piece construction of the Enve 1.0 fork, with no cut fibers and complete removal of the moulding bladder, is the type of construction major bike manufacturers are only now starting to utilize themselves. This precision, and attention to detail in the manufacturing, leads to a piece that’s incredibly stiff while also being exceptionally light. When you hear the stiffness of a fork discussed, it can be an abstract concept. The fork on your bike likely seems fine. When you actually experience a stiff fork, it is surprising how much a difference it makes. The whole bike feels more planted and solid in your hands. It goes where you want it, when you want it to, and generally helps it feel like an extension of your body. At the same time, this piece took half a pound of weight off of the bike. I said the same thing when I originally wrote the review, this might not need to be your first upgrade, but don’t discount what a big difference it makes to the bike.
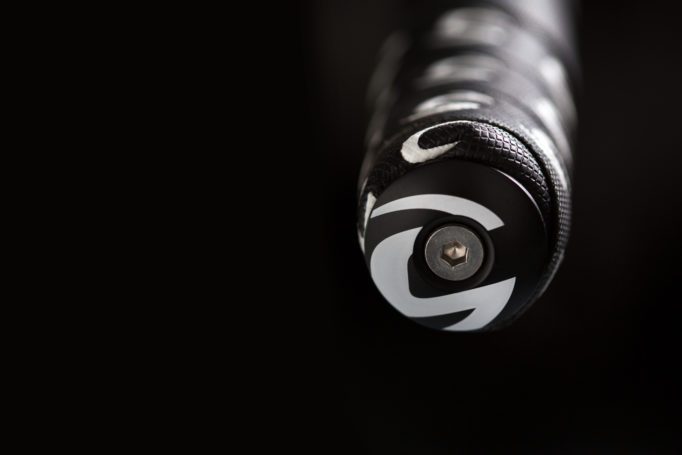
It’s a small thing, but the feel of bar tape, especially if you ride without gloves is important; and it’s a cheap feel good upgrade
There are also a few details that I haven’t previously covered. There are decisions you’ll need to make on every bike build about details that can really set the tone for a finished piece. One of those details is the bar tape. There was a time when one of my favorite pastimes was to wander around a bike shop for a while, study all the bar tapes, and eventually come home with a new roll of bar tape. It’s a good way to buy something for your bike without really spending much money.
I haven’t done that in the last couple of years, though, because early in this build, I started testing the Cannondale Pro Grip Bar Tape. It runs about $30 and it’s available in black, red, light blue, Cannondale green, and white. The feel of it is somewhat unique. It’s not as tacky as something like Lizard Skins, but it provides exceptional grip no matter how wet things might get. I ride without gloves, unless it’s cold, and I have found it to do an excellent job of balancing everything you want in a good bar tape. The grip is wonderful, but you won’t get blisters, and the gel backing it has does a great job of killing road vibration without overly deadening the feel through your hands.
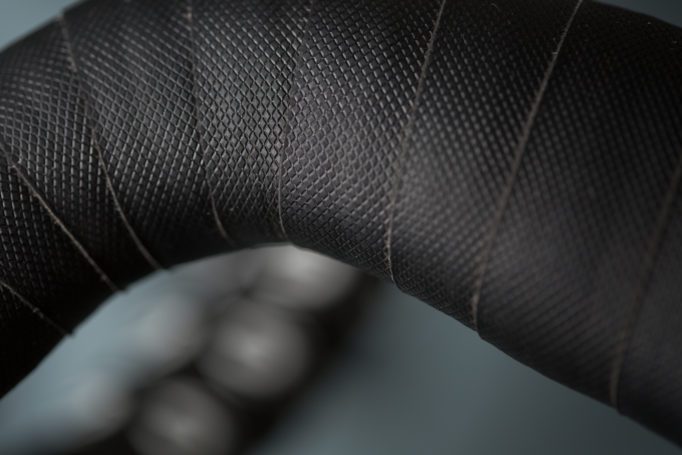
Cannondale’s Pro Grip Bar Tape, long lasting and comfortable
What’s really astounding about it, though, is its longevity. I’ve used the same roll of bar tape for thousands of miles, and I still have no particular need to change it out. Finding it locally isn’t an easy thing, you’ll likely need to order it through a Cannondale dealer, but it is absolutely worth looking for it. The value is amazing, it comes with high quality end plugs, it’s long enough to handle even aero bars, and it’s the perfect finishing touch for a Cannondale bike.
Another small detail I had to decide on was paint. This particular CAAD9 was originally brushed aluminium on the front half, with a painted rear end, and a liberal sprinkling of Cannondale decals. After years of cheap bike racks, rough handling, and a bit of general neglect, the original finish wasn’t looking so fantastic. I spent a good amount of time on this detail and what I ended up with was a bead blast with a clear powder coat. I wanted something that was going to be tough and affordable, and I also wanted to showcase the aluminium as that is one of the special details about the Cannondale CAAD frames.
It ended up being harder than expected to find a media blasting company that would handle a bike frame, but after some searching, I found a local company, Quality Sand Blasting in Clackamas, OR, who was familiar with handling aluminium bike frames. It was their guidance that led me to bead blasting, but I still wasn’t exactly sure what I would end up with. I would describe it as looking like grey paint but with more depth. Once I added the clear powder coat, handled by Class Act Paint & Powder in Portland, OR, I ended up with something that looks like glossy grey paint until it is hit with some light. In the sun, when you look closely, you’ll see all kind of depth and sparkle. It’s both understated and unique while being incredibly tough. I left the frame bare, aside from the Cannondale head tube badge, and it has turned into a constant point of conversation that only cost $100. It also ended up saving 100 grams compared to the frame with the original paint and decals.
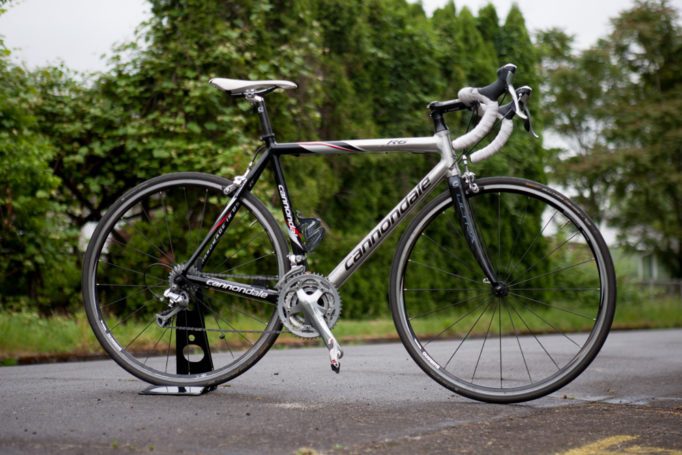
The Cannondale CAAD9 in it’s original finish, we think you’ll agree the new look is an improvement
When I started this project, I didn’t define the end goals in terms of anything specific. I had its use in mind, do it all, but I didn’t set out with the intention of comparing it to anything. Now that it’s done the question that I have to ask is; was it worth it?
This isn’t something I can answer as universally as I like to, but when you add up the pieces, it’s enough money that you could buy something very nice as a package. But it wouldn’t be unique to you. There aren’t many Cannondale aluminium frames running Campagnolo groupsets, and I think it’s unlikely you could put together a package quite as nice as this by walking into a bike shop and selecting a complete package. In terms of specific numbers, one thing I paid attention to was weight, and on that front, this project dropped 5lbs. The bike was 22lbs as it came from Cannondale, and it’s now 17lbs. It also handles everything you could ask of a road bike. This isn’t an “all road” bike, and it’s also not the kind of bike you are going to commute with to the store and lock up on the sidewalk.
If you want to go fast, though, this is your bike. Take it up the steepest hills, down long descents, to work in record time, pull your kiddo in a trailer, or mix it up on a TT course or road race of whatever genre strikes you, and you’ll never feel it lacking. Even going to a vastly stiffer full carbon frame, the only thing I really notice is that the rear triangle has a bit of flex. And…now that I’ve covered a do it all bike, it’s time to start talking about what it might look like if you wanted all out performance with no need to “do it all”. More coming soon.


