
Tyre Glider
by Paul Horta-Hopkins · 19/12/2023
The Tyre Glider is described as an evolution of the tyre lever. After a couple of tries, I’m convinced.
Tyre levers have been around for as long as we’ve had pneumatic tyres. While the original metal levers have been, mostly, replaced by plastic, the design has hardly changed. The reason it’s stayed the same is that it works; most of the time. There are tyre/rim combinations that can defeat them and this led one enterprising inventor to come up with his own design, the Tyre Glider.


The idea for the Tyre Glider came about while its inventor was a cycling novice. Being new to cycling allowed him to look at this ubiquitous tool, see its limitations and rather than accept them, design something better.
Changing tyres is a task that every cyclist should be able to do. While some tyre/rim combinations will allow you to achieve this tool-free, that’s not always the case. The traditional tyre lever can be used singly, as a pair, or sometimes in threes. It requires a thin blade, that can hook under a tyre’s bead and prise it up and over the rim. It has to do this without damaging the rim or inner-tube – if there is one. Once the bead is over the rim it then needs to give you enough purchase to prise the rest of the tyre off.

Why change?
As I said previously, the traditional design does work most of the time. It can require a bit of experience to use them and tighter fitting tubeless tyres can be a challenge. This can mean you are desperately trying to get the lever under the bead and then watching as it bends when you apply pressure. When it come to re-installing the tyre, getting the last part of the tyre on can be a massive pain and result in grazed knuckles; not good when standing road-side in the rain!
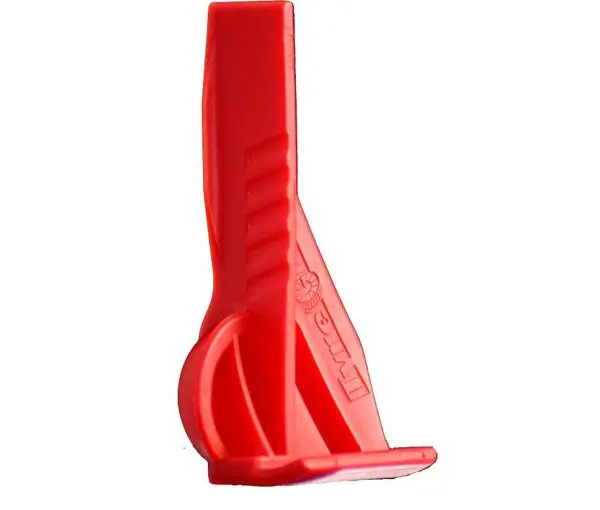
So the Tyre Glider, if it works, could be a god-send to the frustrated cyclist. When you first look at it, it looks nothing like a tyre lever. If I hadn’t known what it was, I think I would have been surprised when told what it is! It’s made from a bright red recycled plastic, with strange angles and an odd ‘knuckle’ on one side.
How to use the Tyre Glider

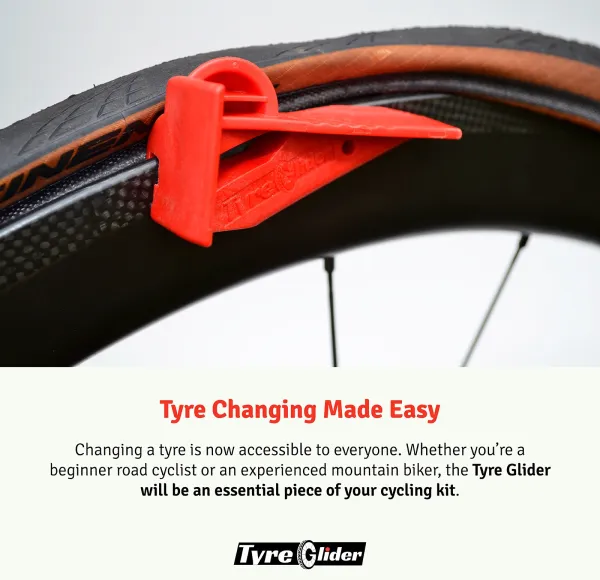
A quick look at Tyre Glider’s YouTube videos shows you how to use it and it it pretty simple. While inserting the hook of the Tyre Glider is similar to using a standard lever, it is much wider. I had thought that this would make it difficult due to the curve of the rim. However that wasn’t an issue at all. Once you’ve got the bead up you rotate the lever down against the rim. Now it’s braced against the rim’s sidewall you can push the lever and it ‘scoops’ the tyre off.
On the wheels I tried it out on, the initial push to get the lever moving required a bit of effort. The best way to do this, as recommended on Tyre Glider’s site, is to stand above and push down. This way you can use your body weight, rather than your weedy cyclist arms! Once you’ve got the lever moving though the tyre does just glide off, impressive.
Re-installing the tyre requires you to use a technique very different from a normal tyre lever. You use the odd ‘knuckle’ shape and a rebate that allows the lever to sit on top of the rim’s edge. Once the rebate is located on top of the rim you start pushing and the ‘knuckle’ guides the tyre back into place. It doesn’t require much force until you get to the last section, where the tyre starts to get tight. This is the point where you can start losing patience and levers with a traditional set-up. However, using the same body-weight technique as when you removed the tyre, push down and the tyre pops back on.
Conclusion
So far I’ve only tested it on three rim /tyre combinations, all of which were road tyres. One was an older narrow rim, while the others were wider, but it worked on both sorts. I’ll try it out on some gravel and Mtb tyres and if there is any difference in the performance I’ll let you know.
My only quibble would be that when applying pressure during re-installation, the lever’s body is a bit sharp. I found that using bike gloves or a rag sorted this, but maybe a slight change to the shape of the body could help here? Using it on a carbon rim did leave some scuff marks, so maybe avoid them? Overall though I was impressed with the Tyre Glider and will be taking it with me from now on.
Check out the video below of my first experience of using the Tyre Glider. If you would like to buy one, head over to the Tyre Glider website. We though it would make a nice stocking filler if you were looking to get Christmas Sorted.


